

Africa is a focus for my district's K-12 Art team this year to coincide with our high school's Cultural Heritage Week. Every student is learning about Africa and creating an African-inspired artwork. 3rd grade students were inspired by the artwork of Katunga Carimbwe, whose prints I discovered here while searching for Art from Southern Africa. The Art of Africa website specializes in Arts and Crafts of San/Bushmen people. There is a lot of cool artwork there so I encourage you to check it out! (An upcoming post will show you a 2nd grade project inspired by another artist found on that website.)

I really enjoyed Carimbwe's printmaking and thought the students would respond well to the stylized animal imagery. The assignment was to draw an animal from the Kalahari Desert (which I've read is not a "true" desert due to the amount of precipitation but let me get back to the point,) and turn it into a print. I ordered some 4x6 inch plates made out of the same kind of foam as meat trays... and I can't remember what it's called!
In the first class, I showed the students images of Carimbwe's artwork and asked them if they could identify a theme (animals/nature). I read them part of the artist's biography and showed them where Southern Africa is on a world map. Next, I showed them where the Kalahar Desert is. I wanted to avoid lumping everything into "African" so my strategy was to pick a specific place and research animals that live there. I printed reference photos for several of the animals from that habitat and put them in folders at each table for easy access.* I gave a quick introduction to printmaking and passed out some cheap drawing paper cut to 4x6 inches to match the plate size. The students had the rest of the class to choose and draw a Kalahari Desert animal. I did point out how the artist used patterns and borders in his prints and encouraged the students to do the same.

*And now I remember why I don't use folders at the tables very often. It drives me BATTY when the students don't put the papers back in the folders neatly, which is the case about 98.3% of the time. If the papers are just thrown in there they get all bent and torn which defeats the purpose of the folder!
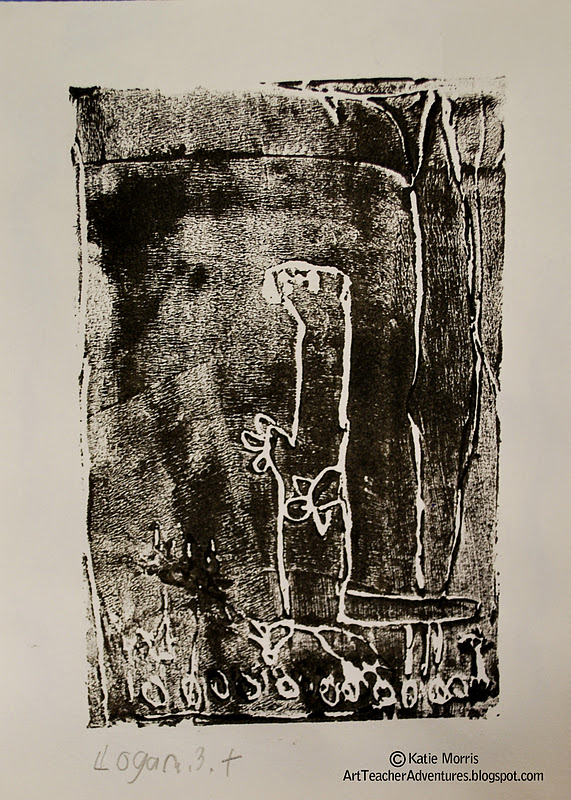
In the second class, the students placed their drawings on top of the foam plates and traced with pencil. If you use this method, it is really important to have students trace back over their lines on the plate after removing the drawings to make the lines deep enough. By the time they finished that step, there wasn't a ton of class time left! I demonstrated inking a plate and pulling a print and the students had time to make one print. It was at this point in my first class that I realized I was going to have to add one more class period. I haven't been able to order supplies yet (and actually haven't gotten an answer to what my budget's going to be yet) so I had to use black tempera paint instead of printing ink. It worked ok, but printing ink definitely works better.

In the third class, I had the students use watercolors to hand-color their prints from day 2 while I worked with individuals. I had one printmaking station set up and called one student at a time over to me. I gave them a private demo and helped them get one nice black and white print. Even though I hadn't planned on 3 class periods, it was cool to see the original drawing, a more traditional black and white print, and a very colorful print!


I had to narrow down my 105(ish) students' work to the top 4 that will be displayed in an Art show at the high school and it was HARD! I can't wait to see what the students write for their artist statements!
No comments:
Post a Comment